In this article I will explain how to access your Exchange Webmail account using MFA (Multi-Factor Authentication)
Prerequisites:
Microsoft Authenticator Application for Android or Iphone
Exchange Account
Step 1 - Logging into the Webmail URL
First we will start with logging into the Exchange Webmail URL.
https://auth.prestigetechnologies.com
Once you arrive at the site you will see a login screen as shown below.
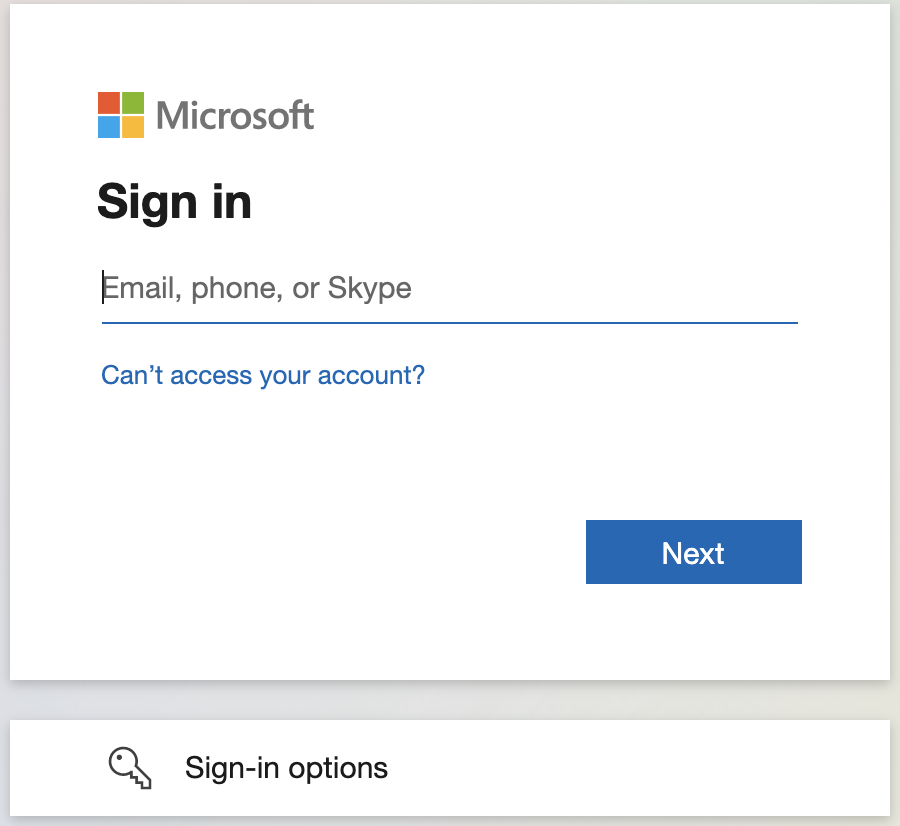
Sign in with your email address and click Next.
You will then be asked to enter your password as shown below and your email address should be shown above Enter Password to identify the login you are using.

Click Sign in
Step 2 - MFA Setup
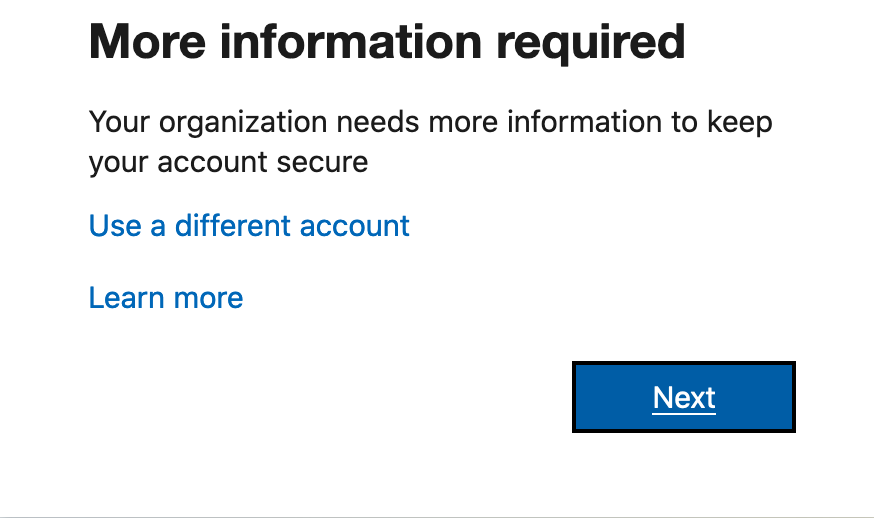
Once you click Sign in you will be presented with a page that says "More Information Required"
If it is the correct account choose Next. If you need to change the email account then this is your time to choose "Use a Different Account"
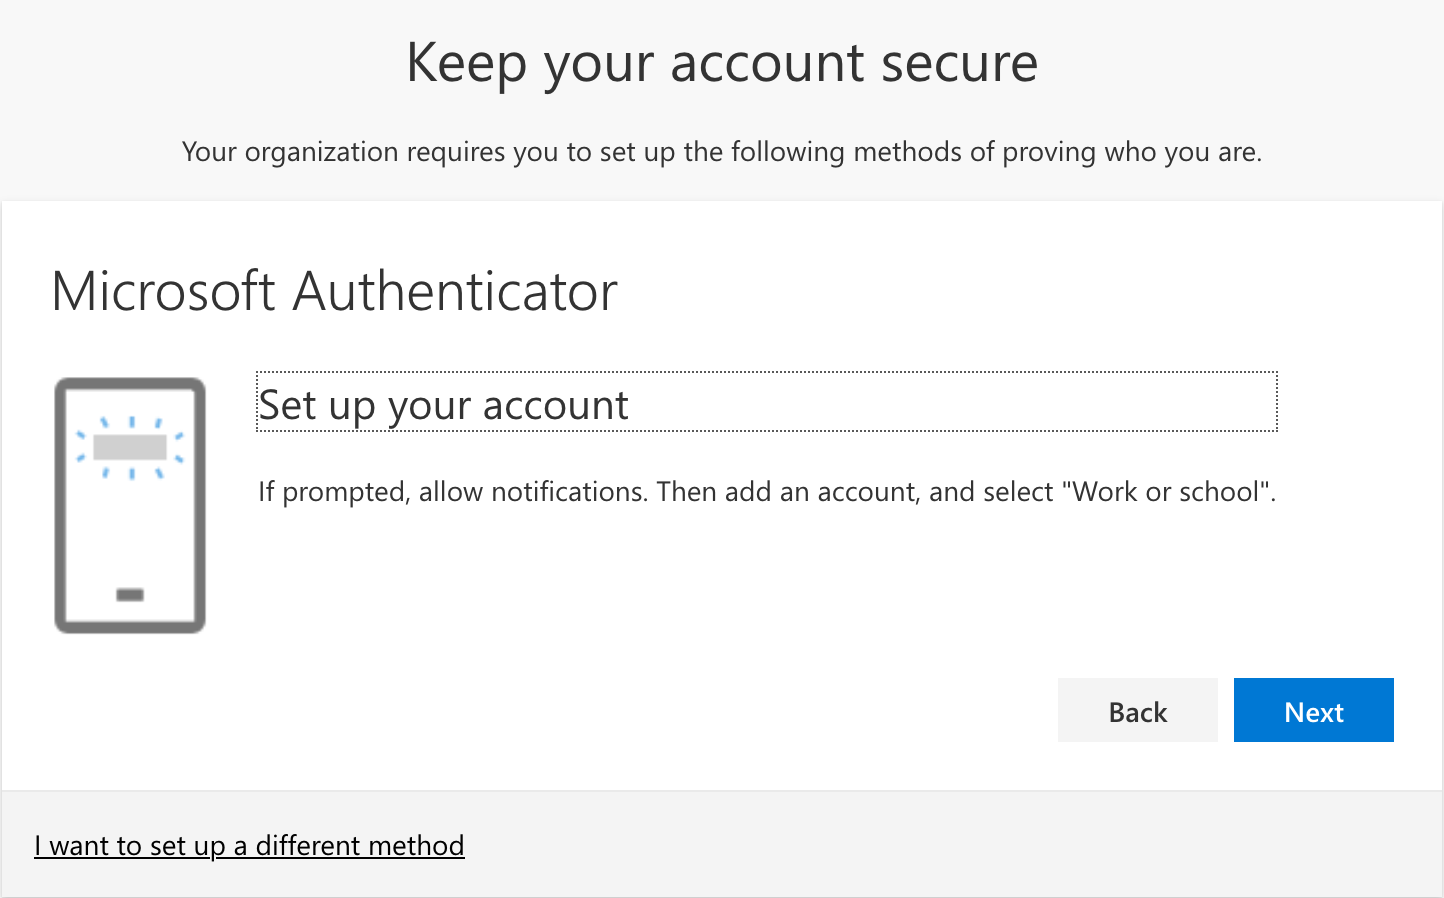
Once you click Next you will be presented with a screen to start setting up your Microsoft Authenticator App. At this time you will need to download the Microsoft Authenticator App to your mobile device.

Once it is downloaded and installed you can click Next.
Once you click Next you will be presented with a screen that says to Setup your Account. Click Next.
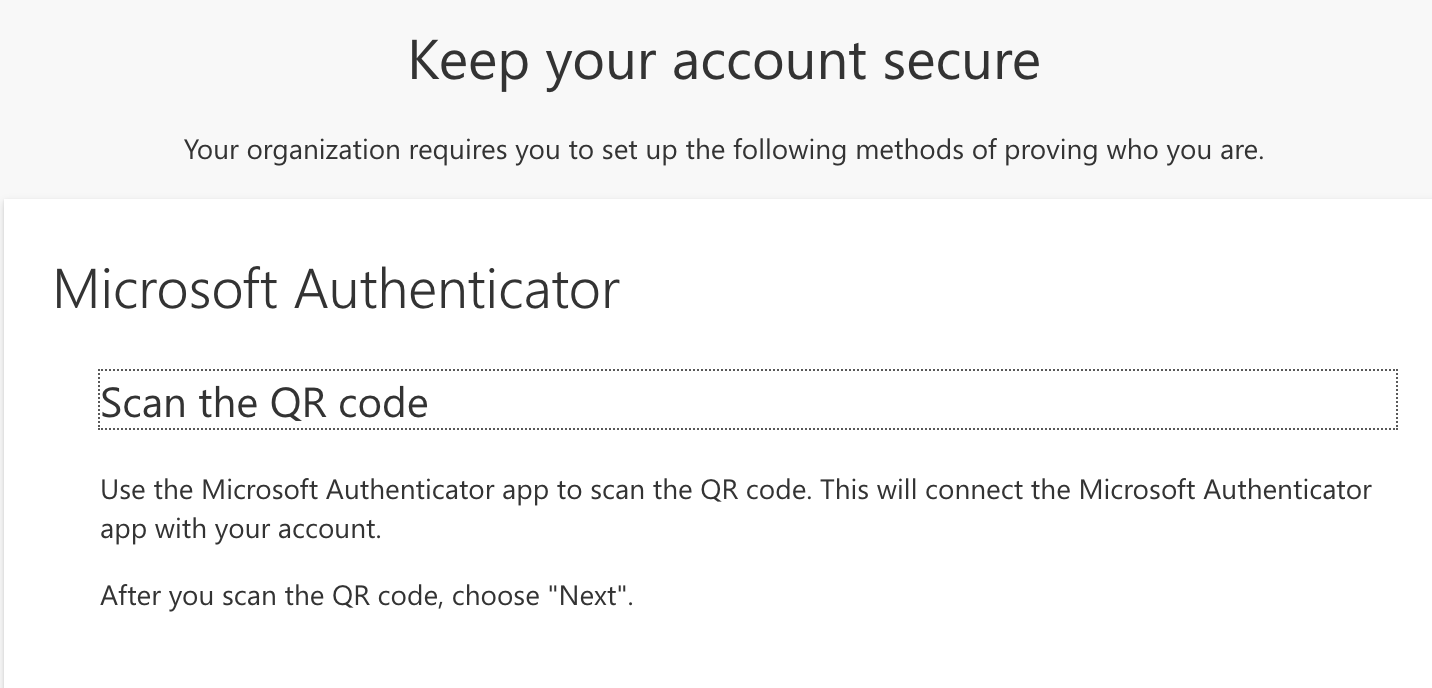
Next you will see a screen and with a QR Code. For security of this help article we are not displaying the QR Code but in your screen you will see one. Once you are on this screen you will want to open the Microsoft Authenticator App on your phone.

Step 3 - Microsoft Authenticator App Setup
In the mobile app at first use you may be asked to login.
If you have a Microsoft login, you can use it here. This will be a profile that will remember all your authentication profiles.
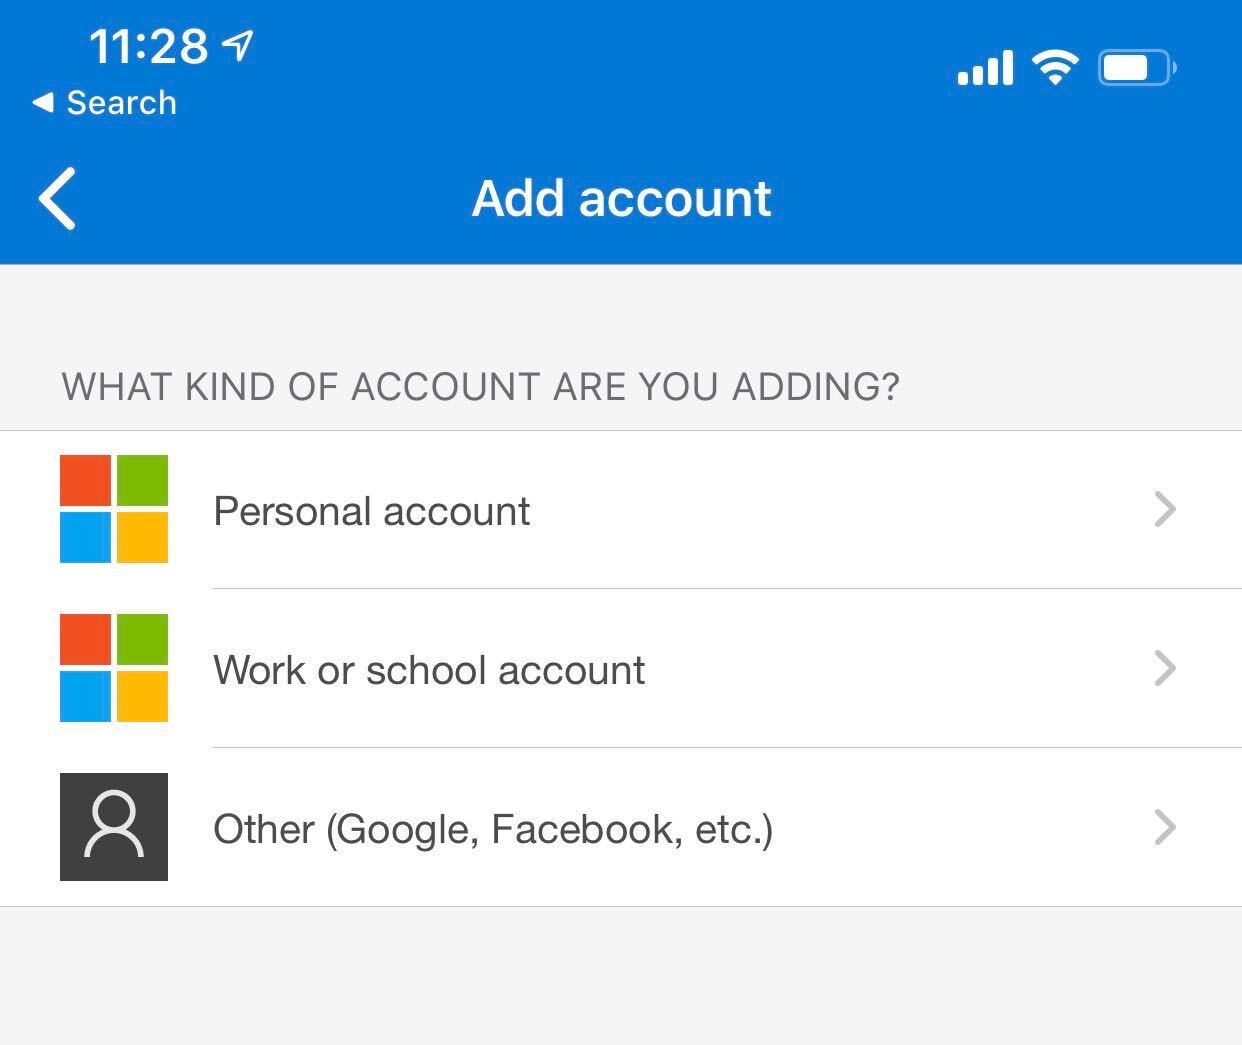
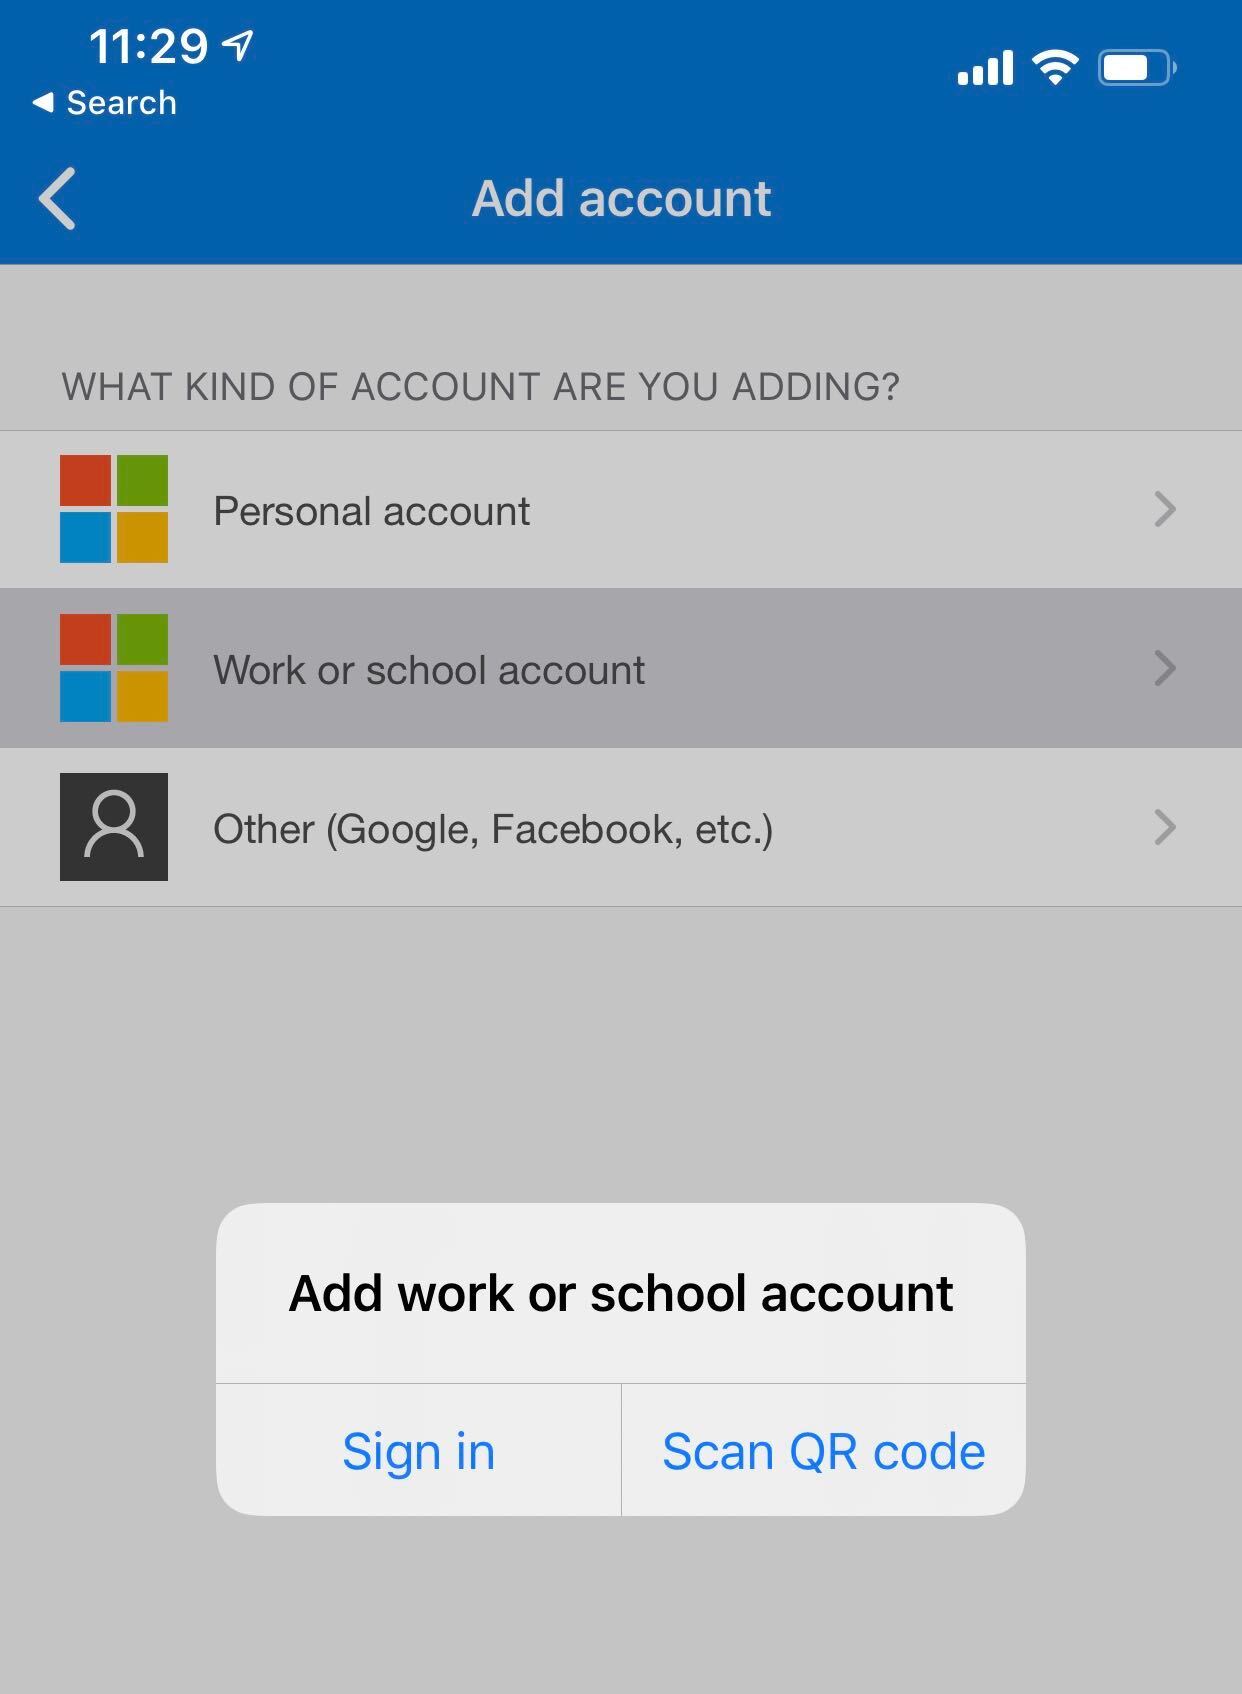
Once in the app you can click the + to add an account, and then here you can choose Work or School account.
Once you have clicked the Work or School account you will be presented with a popup to scan QR code. Click San QR code.
Your phone will ask to have access to your camera. You will need to allow this. Once the camera is enabled you then simply point your phone towards the screen so the QR code is in the camera view.
This should recognize the QR code immediately and present you with another popup that says.
APPROVE SIGN IN
DENY | APPROVE
Choose Approve.
Your Email address should now show as one of the profile entries in the Authenticator Application.
Step 4 - Remember Sign In
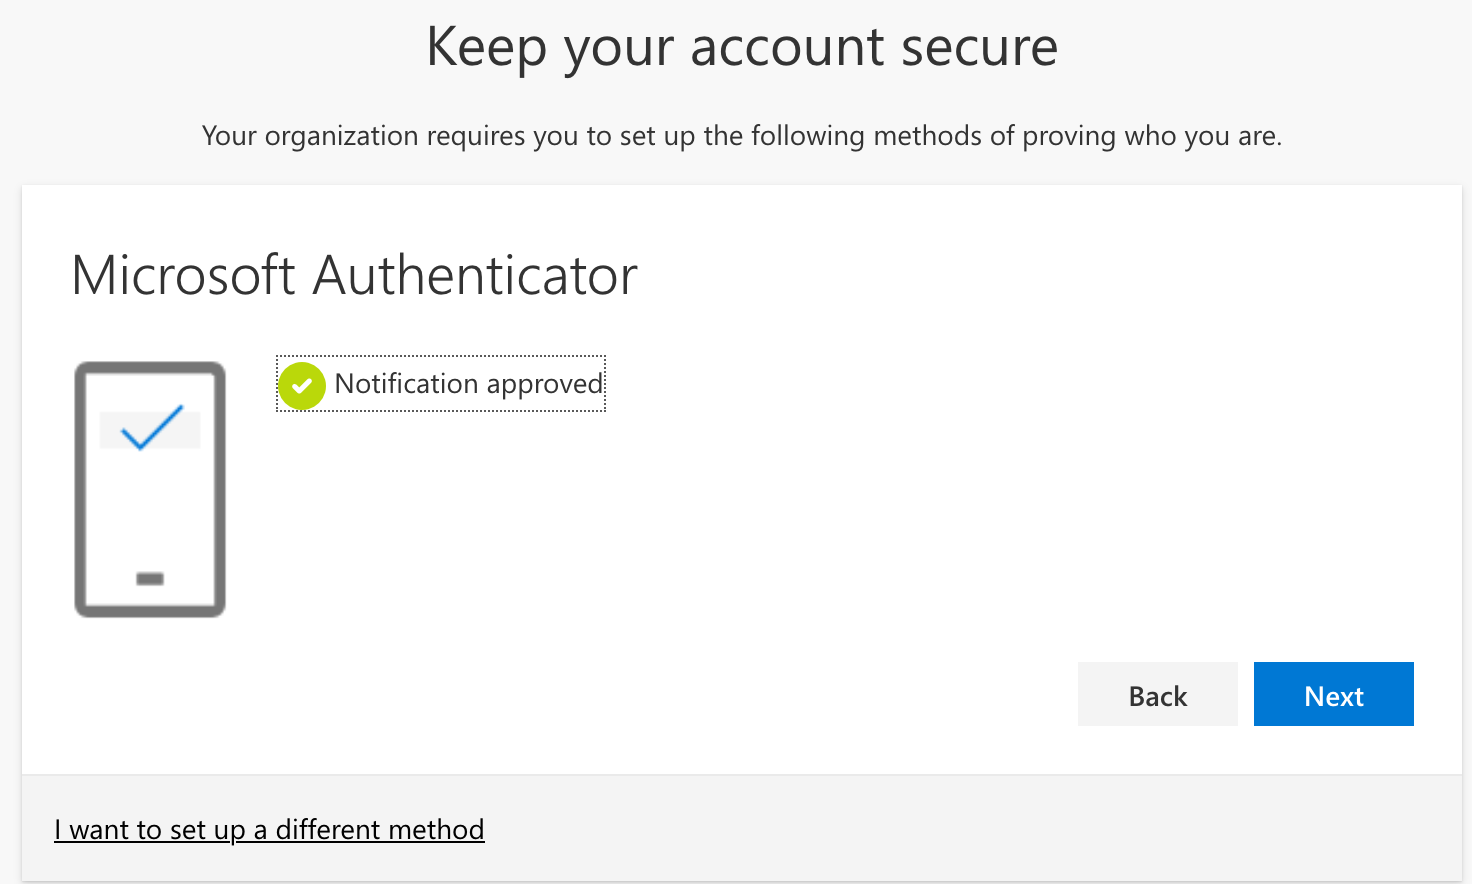
Your screen should show a green checkbox with a Notification Approved message.
Click Next.
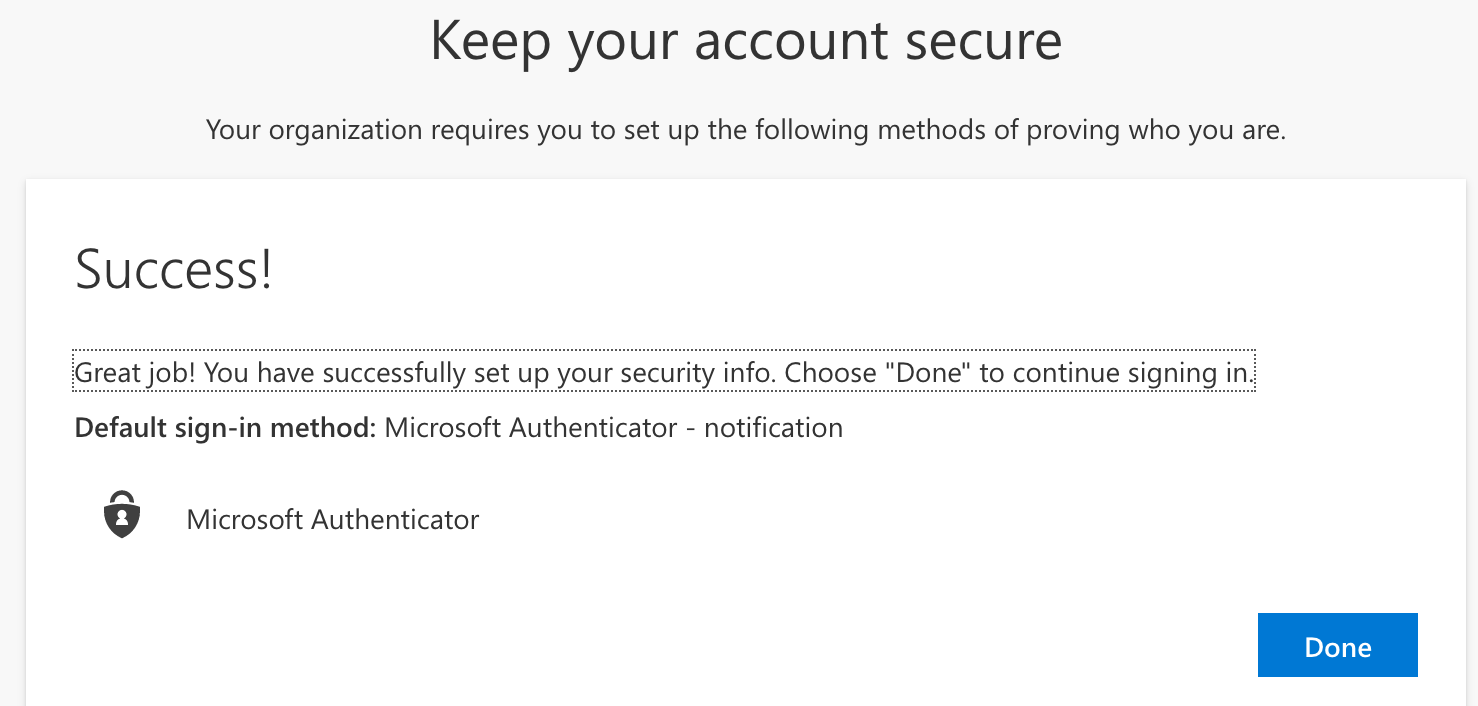
Once you click next you will see a Success! message. Click Done to finish the setup.
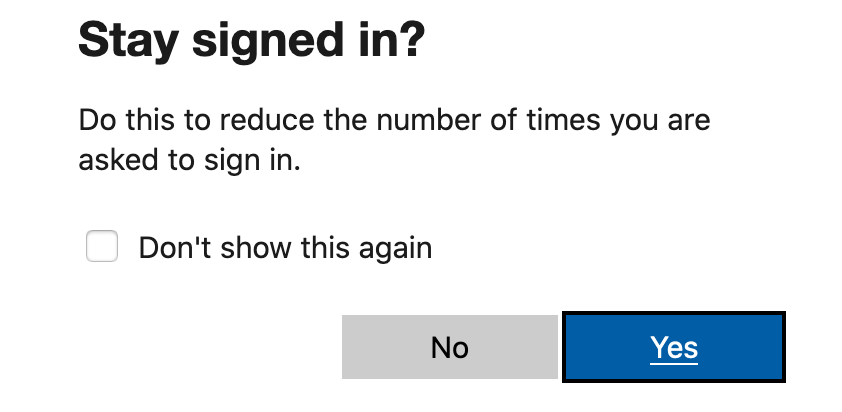
Lastly you will be presented with a message that says, do you want to stay signed in. Basically this will record your device and remember you so you don't have to use the Authenticator each time you login. It will only ask again if you use a new device or new browser or new location. Click Yes if you would like to reduce the number of times you need to sign in or NO if you would like to be asked each time you try to login to Webmail.
That is it, Setup is complete.
Please let us know if you have any questions.
